Is your chamois in its right place? Positioning pads for optimal performance
[ssbp]There are times when we hear cyclists indicate that their cycling pad is “not doing its job” in protecting them as they ride. While it would be easy to say it’s the pad’s fault, we often find out that most of the time it’s just not well-positioned to provide the support it was designed for.
At Elastic Interface®, we help cyclists solve this problem in two ways. First, our customers can send their shorts for our seamstress to place the pad in the correct position. Alternatively, our clothing partners can also send their shorts with the pads sewn in for us to check if it is properly positioned before production begins.
Before we start the process of laying down or adjusting the pad’s positioning, we first identify what discipline the pad is intended for. Whether it’s for road, MTB, or gravel cycling, pressure points and positions on the saddle will vary, so the positioning is done with the correct bike as well.
Once defined, it is then with our technicians and seamstress to check and adjust the pad’s position. Our staff is well experienced that they can identify if the pad is well positioned just by how it feels as soon as they wear the shorts.
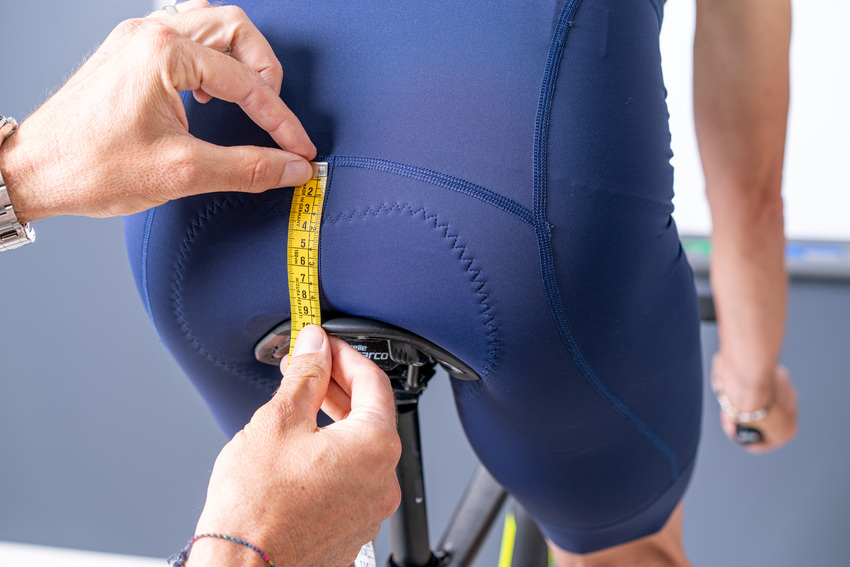
The back and side distances of the pad to the saddle are checked.
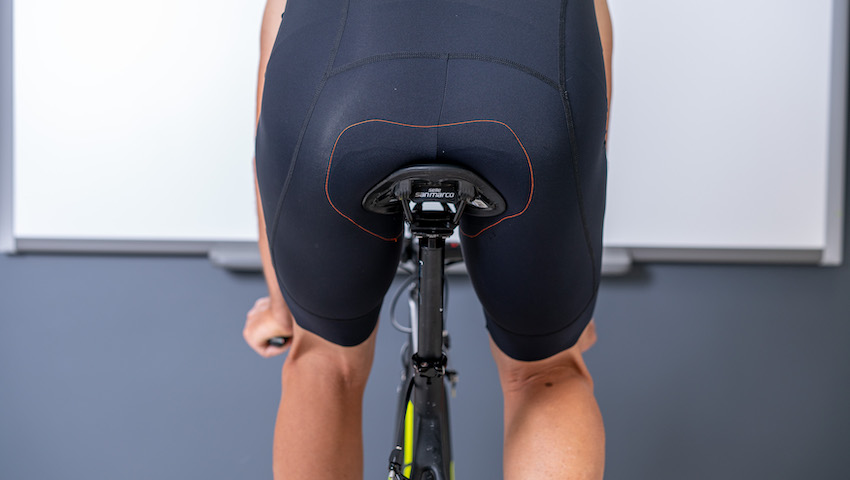
The first thing our technicians do is check the back and side measurements of the pad from the saddle. In the example below, our rider is on the saddle and you can clearly see that the pad is too far back, thus not giving enough protection to the perineal area (front).

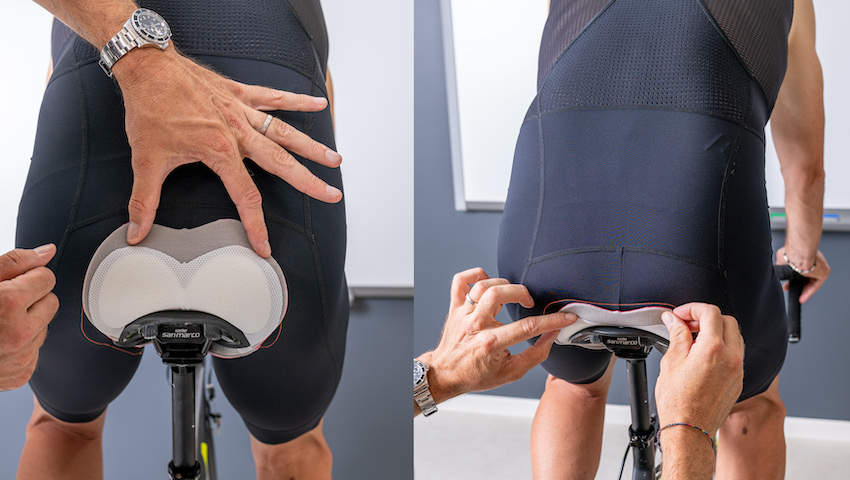
After measuring how many centimeters the pad should be moved, our seamstress removes the stitching of the pad and repositions it accordingly. This process is repeated until our technician confirms the correct positioning in the shorts. Once it’s well-positioned, the final seam is done.
Now here’s a side-by-side comparison, with the inside out, to show the difference after the pad is positioned correctly.

Based on our positioning process above, as cyclists, you can also check if your pads are positioned correctly on your own. Just follow these quick and simple steps:
- Wear the shorts properly and make sure it holds in place 100%.
- Position yourself in the saddle.
Once you are positioned, observe which of these three cases applies to you:
Pad is well-positioned. In this case, the pad addresses the pressure points on the saddle. Not too forward nor too far on your back.
Pad is too far back. You will feel the pad almost covering your back and in front, you will feel sitting directly on the saddle unprotected.
Pad is too forward. You will feel your ischial bones are unprotected and when you pedal, you will feel the wings of the pad interfering with as you try to pedal.
Now that you know how to test your pad’s positioning, you are one step ahead in making sure you are well protected on your next ride. Check for yourself the next time you are trying on a new pair of shorts!